Respiratory Assessment
Detect any respiratory problems before they escalate into emergencies. Conduct the assessment and record your results on our respiratory assessment template.
What is a Respiratory Assessment?
A Respiratory Assessment examines a patient’s thorax and lungs to check for respiratory problems before they worsen. Practitioners can also use a Respiratory Assessment to examine an inpatient’s status and look for indications that will aid them in formulating the next steps for treatment.
Just like any other clinical examination, the Respiratory Assessment or respiratory exam will begin with the healthcare practitioner asking about the patient's medical history. Afterwards, the respiratory exam will go as follows:
Hands
- The practitioner inspects the hands for cyanosis, thinned skin, clubbing, tremors/asterixis, and erythema.
- They also palpate the patient’s arms to check their temperature, heart rate, and respiratory rate.
Face, eyes, and mouth
The practitioner assesses the patient’s jugular venous pressure (JVP) and inspects the face, eyes, and mouth for cyanosis, pallor, Horner’s syndrome, poor dentition, oral candidiasis, nasal flaring, and more.
Chest and trachea
- The practitioner begins the assessment of the chest by inspecting it for any chest wall deformities, skin changes, abnormal breathing patterns like labored breathing, use of abdominal accessory muscle, or scars.
- Normal breath sounds are heard over the lung surfaces, or lung sounds clear bilaterally.
- They palpate the chest to check for a displaced apex beat and the trachea for any deviation or abnormal criscosternal distance.
- Assessing the patient’s chest rise and lung expansion requires inspection and palpation of the anterior and posterior thorax.
- The final steps are percussing and auscultating the anterior and posterior chest wall to check percussion notes, vocal resonance, breath sound quality, and volume. It should also be documented if, on auscultation, bilateral coarse crackles, and if there is any pursed lip breathing noted.
- During the test, observe if the patient reports coughing up blood-tinged, green sputum. Look for signs of an intermittent productive cough during the assessment.
Lymph nodes and other parts
- Before the practitioner switches to the anterior or posterior chest walls, the practitioner will palpate the lymph nodes for lymphadenopathy.
- When all the tests mentioned above are completed, the practitioner will also palpate other parts of the patient’s body to check for sacral and pedal edema, deep vein thrombosis, and erythema nodosum.
Once all the involved body parts have been checked, the practitioner usually concludes a Respiratory Assessment by summarizing their findings.
Respiratory Assessment Template
Respiratory Assessment Example
How does our template work?
Step 1: Download the template
Access and download a copy of our printable Respiratory Assessment template by clicking the “Use this Template” or “Download this Template” button above.
Step 2: Prepare the equipment and patient
Before conducting the test, you are encouraged to confirm the patient's ID and ask them to fill out the necessary information in the document. Explain how you will conduct the test and ensure you obtain their consent. Prepare a stethoscope and ask pre-test questions written on the template.
Step 3: Conduct the tests
After preparing for your pre-test, follow the flow in this guide's first section or use the template.
Step 4: Record results and proceed with the next steps
After every step, it's recommended that you write down the results immediately after every test. If you observe anything that should be examined further, let your patient know before you diagnose or formulate a treatment plan.
When would you use this template?
Medical health practitioners can use our downloadable Respiratory Assessment template when doing the following:
- Head-to-toe assessment: Healthcare professionals can use this template when conducting a physical examination, comprehensive check-up, or head-to-toe assessment wherein it’s time to examine the patient’s chest and thorax.
- Checking outpatients and monitoring inpatients: Practitioners may also utilize the template when they have to check an outpatient with respiratory problems like chronic obstructive pulmonary disease or an in-patient who has to keep an eye on the patient’s respiratory post-treatment, surgery, or medication.
- Evaluating patients exhibiting symptoms of respiratory problems: Healthcare providers may bring out a copy of our template when they're exhibiting symptoms of respiratory problems like shortness of breath, chest pain, coughing, nose flaring, pale/gray skin color, chest sinking below the neck, and exhibiting a bluish color around the mouth/inside the lips or fingernails.
Do note that there are certain situations where it's more important to address the patient's current respiratory illnesses and not necessarily complete all the test sections.
Benefits of using our template
Early recognition
Our template ensures you check all the areas involving the thorax and lungs. That way, you can easily recognize symptoms like abnormal vesicular breath sounds before other physical exams or imaging tests.
Quick assessment tool
Save time and effort by remembering the step-by-step instructions on how to conduct a Respiratory Assessment. With a template you can use as a guide, you can streamline the testing process and, within a few minutes, have results to use as a basis for discharge or request for further examination.
Written copies of results
Now that you have a document to record the results, there's less chance of you forgetting your observations.
Digitally accessible
Since our free Respiratory Assessment is digitally editable and downloadable, you can access it on any local PDF editor on your device. Alternatively, for efficiency reasons, you can edit, store, and provide access to relevant parties on Carepatron.
Commonly asked questions
Nurses and pulmonologists are most like to use and benefit from our respiratory assessment template.
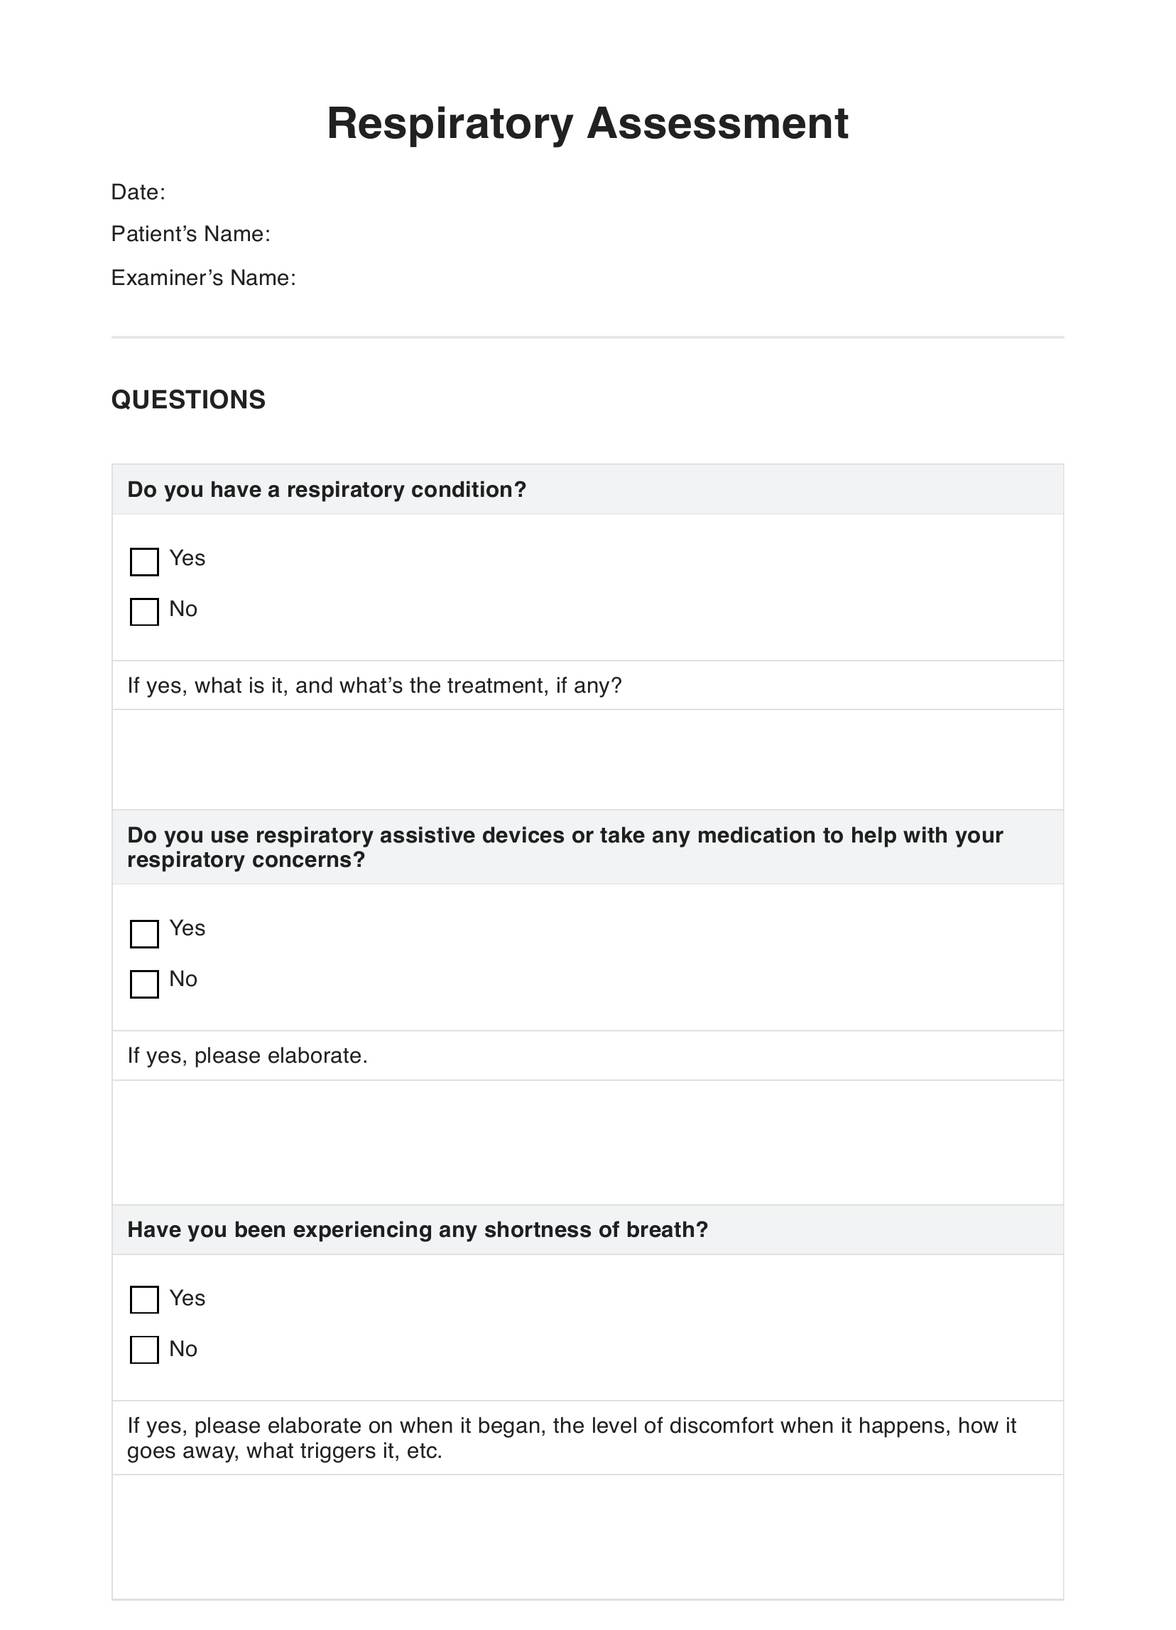
You can use the respiratory assessment template while conducting a head-to-toe assessment on your patient or checking your in-patient recovering from surgery, medication, etc.
How you use it is dependent on you. You can use it as a guide, reference, or document to record your results.